3/16″ / 10′
Subfloor flatness
These guidelines apply to all Wonderland and Blue Mountain products. They cover subfloor preparation, acclimation, expansion requirements, installation method and long-term care. A printable version is available for distribution to installers and end users.
Vinyl plank is designed to replicate a real wood floor, so variation in surface texture, color, grain pattern and gloss is intentional. Work out of several cartons at once — it is what makes the finished floor read as natural rather than repetitive.
Acclimation of material prior to installation is suggested (24 hours) but not required. Where material is acclimated, hold it in the area to be installed between 55°F and 100°F (12.78°C to 38°C). Protect flooring from excessive heat or cold in storage.
If the product is stored somewhere other than the installation site and that space is held within the same 55°F to 100°F range, offsite acclimation is acceptable — but the material must then be delivered directly to the site with no stops in between.
Water traveling over or around the outer edges of the floor can damage the subfloor. Water damage and associated conditions are not warranted, and other contaminants can migrate up as well; these are not manufacturing conditions.
In a lavatory, bathroom, laundry room or any area with frequent water use, fill the expansion spaces around wet areas — and only those areas — with a premium 100% waterproof silicone caulk. That reduces the chance of water traveling under the floating floor and limits bacterial growth.
Do not install fixed objects such as cabinets, islands or wall units on top of the flooring, and do not fasten trim, molding or transition pieces directly to the floor. Refer to the warranty for rolling loads.
Plywood and OSB must be structurally sound and installed to their manufacturer’s recommendations, with a smooth finish free from spring and deflection. Test wood subfloors for moisture using a calibrated pin-type or pinless moisture meter, used according to the meter manufacturer’s instructions. Take readings across the whole area to be installed and keep written records of the results for warranty purposes.
Must be fully cured — at least 60 days old. Flatness must meet or exceed ACI FF25, measured in accordance with ASTM E1155 — follow the procedures within the standard when taking measurements. Most concrete subfloors are not flat enough as poured and need preparation. Fill holes and cracks with a latex-fortified Portland cement-based patching compound, which is the only type recommended. Grind down high areas and fill low areas with the same. Do not use solvents or chemical adhesive removers to strip paint residue or adhesives.
Even though the product is waterproof, slabs must be tested for moisture using either a calcium chloride test per ASTM F1869 or an in-situ relative humidity test per ASTM F2170. A non-destructive moisture meter survey per ASTM F2659 may be used in addition, to screen the slab and find the areas to test — it is a preliminary method and does not replace F1869 or F2170 for acceptance. All moisture testing must be performed strictly in accordance with the procedures in the relevant ASTM standard, including conditioning of the space, the number and location of tests, and test duration. Keep written records of all results for warranty purposes. Moisture in the substrate will not damage the panels, but excessive moisture can migrate to walls and structure and cause bacterial growth if left unattended — which in turn can lead to curling, cupping or doming.
Existing sheet vinyl or linoleum must be non-cushion-backed, firmly adhered to the subfloor across its whole area, and in good condition. Cushion-backed sheet vinyl must be removed. The floor must be clean and free of contaminants.
Existing ceramic or porcelain tile is acceptable provided the grout lines are filled so the surface is flat. Hardwood and laminate are not approved substrates and must be removed before installation.
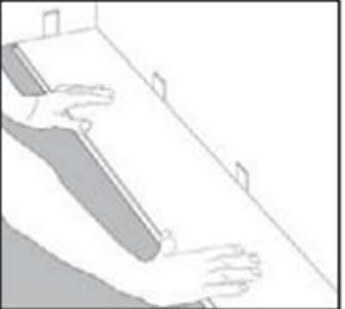
Begin working from left to right. Insert 1/4″ spacers at the ends and edges where planks meet the wall.
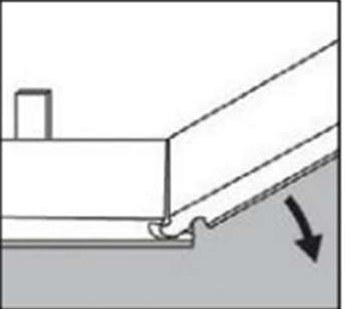
Lock the short end by inserting tongue into groove at roughly 30° and dropping into place. Repeat throughout.
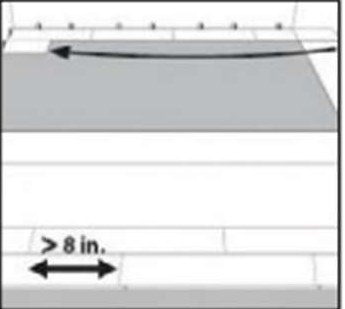
Use the remaining plank from your cut piece to begin the next row. Space end joints a minimum of 8″.
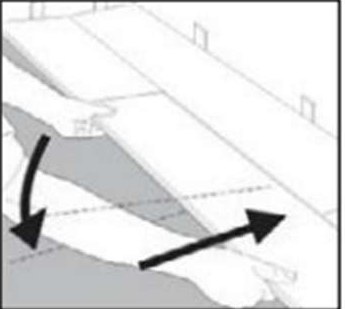
Lock the long edge at roughly 15° and drop into place. Slide toward the previously installed plank until tongue touches groove.
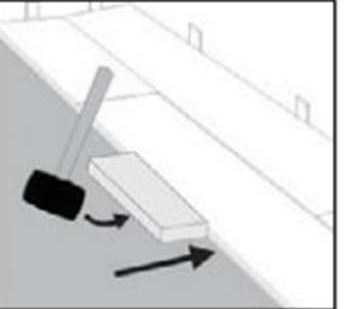
Use a rubber mallet and tapping block on the long edge for a tight fit. The block should be 10″–12″ long. Any gapping will compromise the locking system.
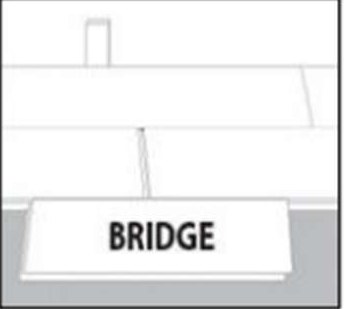
Attach a scrap piece of floor to bridge the gap between the ends of planks.
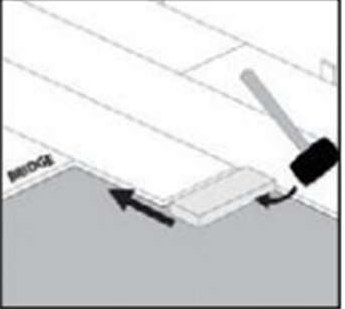
Tap the end of the plank with mallet and tapping block to lock the ends. Remove the support bridge and continue to the end of the row. Tap on the edge of the vinyl so as not to damage the locking profile.
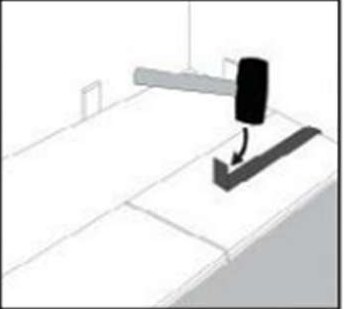
Use mallet and pull bar to lock the final piece in the row. Insert a spacer at the end of the row and continue to the final row.
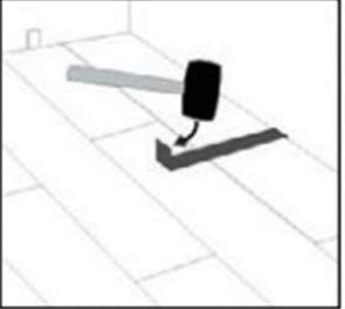
Use mallet and pull bar to lock the long edges of the planks on the final row.
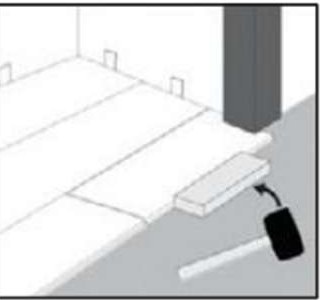
Undercut the door jamb to give the plank room to slide freely. Tap the long edge with mallet and tapping block to lock it.
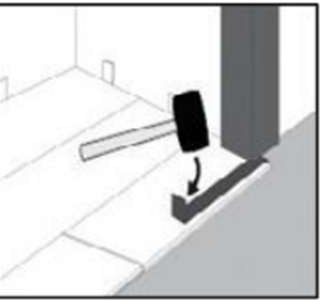
Use mallet and pull bar to draw in and lock the short end of the plank.
Everyday cleaning, surface protection, moisture and sunlight, and what voids a claim are all covered on the warranty & care page, or in the care & maintenance guide (PDF) to hand to the customer.
Download the full guidelines to distribute with an order or forward to an installer.
Download the PDF